Serial communications simulation window
SPLat/PC offers two separate features related to serial communications.
- A built in terminal emulator optimised for debugging on real SPLat boards, documented here.
- A serial simulation feature which interacts with the simulation function in SPLat/PC. That is what this page is about.
Please be careful not to confuse the two.
The serial simulator allows you to inspect serial data transmitted out of the simulated SPLat via instructions such as iiPrintText, and to generate simulated receive data into the simulated SPLat's serial receive buffer.
You can get the serial simulation window by the menu selection Window->Serial. In its raw state it looks like this:
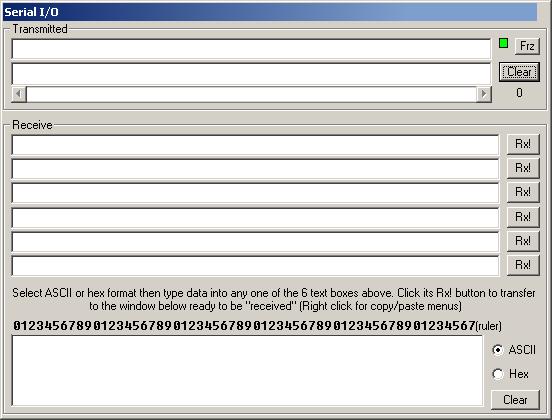
A small pane at the top is related to serial data sent out of the SPLat simulator. The rest is for generating receive data.
Transmitted data
Transmit data is data being transmitted out of the SPLat. From the point of view of the serial simulator window, data is being received (from the (simulated) SPLat). Thus, only the SPLat program can control what appears in the Transmitted pane.
Try the following:
- Launch SPLat/PC (you need version 10.23 or later. You can get the latest from our download page)
- Get the Serial window displayed as above (menu
Window->Serial.) - Set the dialect to "Anything goes" (menu
File->Configure->Dialect) - In the editor enter a single program line as follows:
iiPrintText 251,"Hello World!"
This tells the SPLat (simulator) send the text string "Hello World!" to address 251, which is the serial port. In a real board this will only work if the serial port has been set up to the User programmable protocol. The simulator is more relaxed. - Single-step that instruction (
F8) - Look at the top part of the serial window. It should look like this:
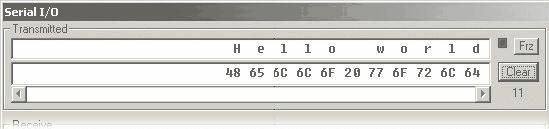
In the top line you can see your text, with extra spacing. Under that you can see the equivalent ASCII/hexadecimal codes for the individual letters/characters. If you are sending mainly readable text, the top line is most useful. If you are sending binary codes, the second line is most useful.
To the right you will see a clear button. Just below that is a count of the number of characters sent since you last hit the Clear button. Above the Clear button is one that freezes the display. While the display is frozen the character counter still operates. Experiment with freezing the display and single stepping the one-line program. The Frz button has an associated red/green indicator.
The scroll bar is useful if there is more to display than will fit on the screen.
See what happens if you modify the SPLat instruction to add carriage return and linefeed characters ('0D and '0A), thus:
iiPrintText 251,"Hello World!",'0D,'0A
Note how non-printing characters are represented in the top line.
In the top line you can see your text, with extra spacing. Under that you can see the equivalent ASCII/hexadecimal codes for the individual letters/characters. If you are sending mainly readable text, the top line is most useful. If you are sending binary codes, the second line is most useful.
To the right you will see a clear button. Just below that is a count of the number of characters sent since you last hit the Clear button. Above the Clear button is one that freezes the display. While the display is frozen the character counter still operates. Experiment with freezing the display and single stepping the one-line program. The Frz button has an associated red/green indicator.
The scroll bar is useful if there is more to display than will fit on the screen.
See what happens if you modify the SPLat instruction to add carriage return and linefeed characters ('0D and '0A), thus: iiPrintText 251,"Hello World!",'0D,'0A
Note how non-printing characters are represented in the top line.
Receive data
Receive data is data that in the real world will be transmitted to the SPLat and received by it. When serial data arrives at the SPLat, it gets appended to a receive buffer. The is a First In - First Out (FIFO) memory which stores received characters until the SPLat program gets around to processing them. Think of it as a character queue for incoming characters. This receive buffer has a finite capacity (typically 128 characters, depending on the SPLat model and/or Firmware version). As long as your SPLat program processes characters out of the receive buffer frequently enough to prevent it from overflowing, no receive data will be lost.
The receive pane contains 6 identical data entry windows, with associated Rx! buttons. This allows you to enter up to 6 different character sequences and simulate their reception. As most of the time you are likely to be writing a program to decode different messages, it is very useful to be able to repeat messages without constantly re-typing them.
In the low right hand corner you will see an ASCII/Hex selector. You use these to tell the simulator how you will be entering data. Select ASCII if you will be "sending" the SPLat textual data, otherwise hex.
Try this:
- Select ASCII
- In the top entry line, type "
Hello SPLat" - Select Hex. You will see the message you just typed change to Hex codes.
- To the entry line, append "
0D 0A". It should now look like this:
48 65 6C 6C 6F 20 53 50 4C 61 74 0D 0A
What you have just done is to set up a message that contains printable characters but ends in carriage return/linefeed characters. This is quite typical of what comes out of instruments like weigh scales or micrometers (for example, our GaugeLink product, which converts the readings from a digital micrometer into serial data, produces something like that).
If you now click the Rx! button next to your message, you will see it appear in the bottom box. Click Rx! again, and a second copy will appear. You now have two copies of the same message sitting in the simulated serial receive buffer, waiting to be process by the SPLat program.
Go back to the editor window and enter the following:
This instruction removes the character from the head of the serial receive buffer (the oldest character) and pushes it into the X register.
Display the SPLat registers (CTRL+R). Now single step the ComRx_ReadOne instruction. You should see two things happen:
- The first character in your message appears in the
Xregister as'48(hex format) or72(decimal format) - The same character will have vanished from the start of the simulated receive buffer.
Each time you step the ComRx_ReadOne instruction, one character will be moved from the receive buffer to X. There are number of instructions for parsing (analyzing the contents of) the receive buffer.