This EasyStep will guide you through creating your first program for the EC1 EasyOne. It creates a flashing LED. This may not seem like much, but it will show you some essential principles of SPLat programming, including MultiTrack (32 processes for the price of one!).
It should take you between 1 and 2 hours to go through this.
Before starting on this, please be sure to have completed the EasyStep Getting started with SPLat/PC. Have your EC1 all hooked up via USB, and SPLat/PC running.
Now locate the Edit window of SPLat/PC. You are going to be typing your first program into that window, and then you are going to get the EC1 to run the program. Here's what the Edit window looks like, with the first line of the program typed in.
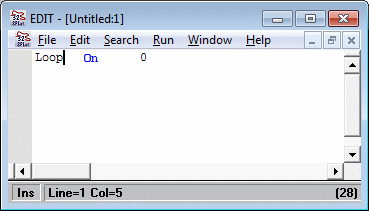
In brief, a program for an EC1 consists of a series of instructions that have been typed into the Edit window using the specific language of SPLat controllers. These instructions tell the board (in your case, the EC1) what steps to take to perform whatever function you want. The EC1 has a limited repertoire of instructions. You can only use those instructions it can understand, and you have to use them with exactly the correct spelling and in exactly the correct format.
Think of the EC1 as an incredibly dumb, unbelievably literal, but amazingly fast.
Here is the program. Before you type it in, move your mouse over each line in turn, starting from the top, and study the pop-up descriptions.
Once you have read through the pop-up descriptions in the above program, you are ready to type it into the Edit window on SPLat/PC. Go ahead — type away! Your Edit window should end up looking like this:
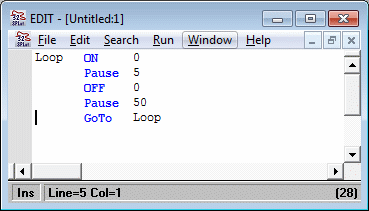
Now would be a good time to save your program via the File menu. The file name will end in .spt
Now you are going to transfer the program to your EC1 board and run it. At the moment, it exists only as a bunch of text in the SPLat/PC editor. In that form it's no use to the board — the program must be translated into the 1's and 0's that the board understands. You do this by invoking the Translate command under the File menu in SPLat/PC
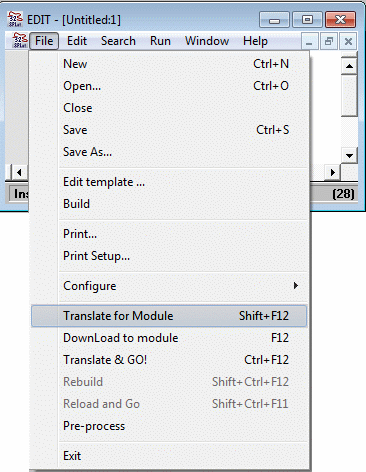
You may wonder why it refers to "Module". That's what we called them back in the early days of SPLat. These days we prefer to use the term board, but we haven't changed the terminology in SPLat/PC.
Go ahead, do the translation. You should get a success message like this:
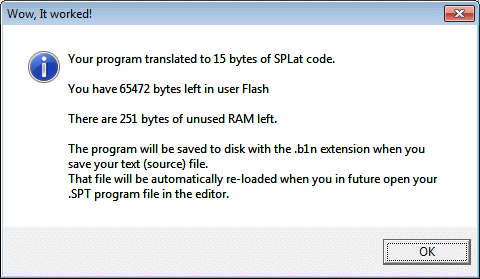
If you get an error message of some kind, double check all your typing. Does the "Loop" label start in column one? Are the key words spelled correctly?
Click the OK button
Now make sure your EC1 is plugged into the computer, and that it has connected to SPLat/PC. This was all done in the previous EasyStep. Your Module window should look substantially like this:
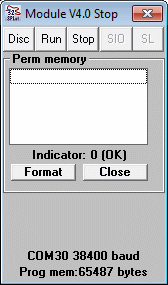
Now we are ready to transfer the translated program (all 15 bytes of it!) to the board. Use the menu selection shown:
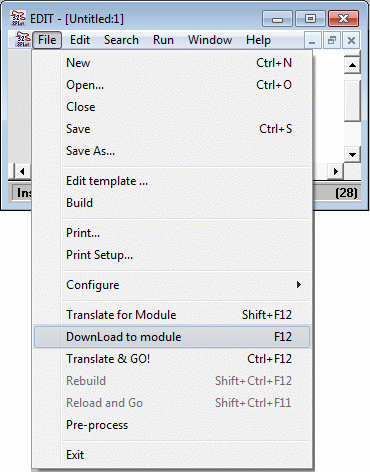
You should be rewarded with the following message:
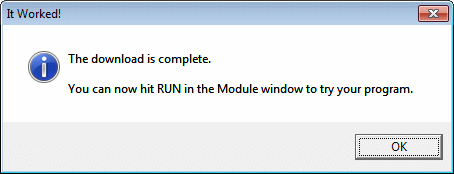
So, follow the suggestion in the window, and click the Run button in the Module window.
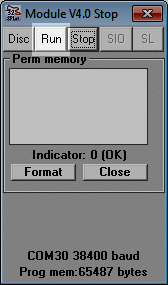
You should see a flashing green LED on the EC1 board
Click the Stop button on the Module window to stop the program and give control of the board back to SPLat/PC.
Congratulations, you have just achieved the following.
- Learned the most important operations needed to use SPLat/PC;
- Learned something like 30% of all the core concepts underlying all computer programming;
- Learned four out of the 14 instructions in the SPLat FastTrack instruction set. FastTrack could be just about all you ever need to write basic programs in SPLat.
Of course, SPLat has a lot more than 14 instructions. We stopped counting at 450. But the nice thing is that you can get an observable result with just 4 instructions and 5 lines of code. As you have seen, you can get a result quickly, but the depth and scope of the SPLat instruction repertoire means you can grow into it gradually as you gain understanding, experience and ambition.
Next: Take a break. Stretch your legs. Have a cup of your favourite beverage — but keep a clear head, because you ain't seen nothing yet!
Come back in 10 minutes!
OK, back again?
Just for a little warmup, try the following exercises:
- Modify the program for different timings. Make the LED flash faster, or slower;
- Change to output 1 instead of 0. Make sure you change both relevant lines of code;
- Explore Menu File > Translate and Go!. You should quickly discover that if the board is connected to SPLat/PC, Ctrl+F12 is the fastest way of getting an updated program running in the board;
- Modify the program to give 2 short flashes and one long flash. You will have to add a few lines of code;
- In 25 words or less, describe what is difficult about this. If you get more than one word, please write to us.
Now for our promise of 32 processes for the price of one...
What you are now going to do is make two copies of your LED flasher program, using different outputs (guess what, outputs 0 and 1), and with a different line label for the GoTo In fact, we will change the label name(s) to RedFlash and GreenFlash
Use the copy and paste edit commands (good old Ctrl+C—Ctrl+V) to make two copies of the program, and edit the output numbers, line labels and GoTo instructions so you wind up with something that looks like this: (No pop-ups on this one!)
RedFlash   On        1
           Pause     5
           Off       1
           Pause     25
           GoTo      RedFlash

GreenFlash On        0
           Pause     5
           Off       0
           Pause     26
           GoTo      GreenFlash
If you try to run the above code, what will happen? Well, when it gets down to the line GoTo RedFlash it will jump back up to the line labelled RedFlash. The GreenFlash stuff won't get a look-in. Try it if you don't believe me!
But if I make one simple addition, I can make it do both flashing tasks at once. Run your mouse over the first 3 lines of this:
           LaunchTask    RedFlash
           LaunchTask    GreenFlash
           RunTasksForever
RedFlash   On        1
           Pause     5
           Off       1
           Pause     25
           GoTo      RedFlash

GreenFlash On        0
           Pause     5
           Off       0
           Pause     26
           GoTo      GreenFlash
Can you see how adding just the two instructions LaunchTask and RunTasksForever to your repertoire allows you to make the EC1 do several things at once? In fact it can do 32 things at once — 32 processes for the price of one!
News flash: EC1 now supports 64 simultaneous tasks!
Translate the program and run it in your EC1. The two LEDs will flash, but at slightly different rates. The visual effect is that they slip in and out of synchronisation with each other.

