Pair an EC1 with a cheap Bluetooth module and you have a potent combination that can leverage an Android device as a remote control device. Our SimpleHMI programming framework makes it very easy to make useful apps. This EasyStep provides a very simple (read: "understandable") program that shows how it works. Let you creativity take it from there!
What you will need
- An Android 'phone or tablet with Bluetooth and SimpleHMI installed (QR code displayed just over there------> );
- A Bluetooth module connected to an EC1, and paired to your Android device. See this EasyStep;
What the SPLat program does
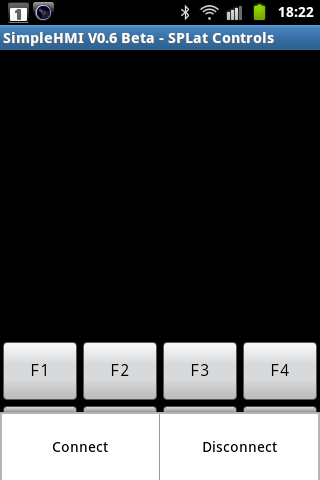
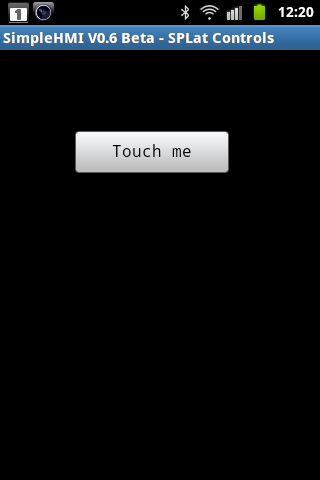
The sample SPLat program given below displays a single button on your Android 'phone. When you touch the button it blinks the red LED on the EC1. It's not exactly a fancy trick, but it contains a lot of elements you can build on to create your own, much more interesting applications for Android connectivity.
To run the program
You can now download the program. Follow these steps and you will soon have mastery of a LED from your 'phone.
- Close all running copies of SPLat/PC
- Click this link to download the program and launch it into
SPLat/PC. Depending on what browser you are running, you will need to select the appropriate option to run the file in the matching application (SPLat/PC).
Once the program is loaded into SPLat/PC, the edit window should look something like this:
- Connect SPLat/PC to the EC1. Details.
The Module window in SPLat/PC should now look something like this:
- Hit CTRL+F12 to translate the program and send it to the EC1 and run it. The green LED should start flashing;
- Launch SimpleHMI on your 'phone;
- Touch the menu button on your 'phone;
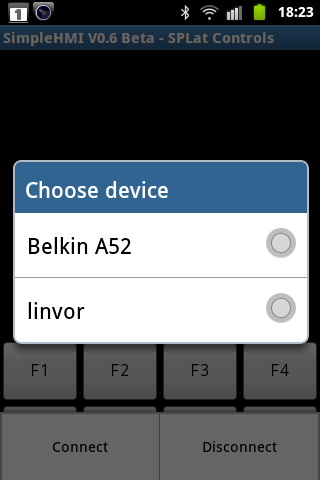
- Select "Connect";
- You will (probably) be given a list of devices. Select your Bluetooth module. Mine calls itself Linvor. Yours may be HC-06;
- After a few seconds the 'phone should connect to the Bluetooth module, and the LED on the module should go to steady on.
If the EC1 is all in order it should run its
evConnected
subroutine and paint its home screen.;
- Touch the button. The red LED on the EC1 should flash once;
Sometimes the Bluetooth devices can be a bit ornery about making a connection. If you are having trouble note the state of the LED on the Bluetooth module. Flashing means not connected. Steady means connected. There is no signal for paired but not connected.
If the BT module is connecting to your phone, the problem lies on the EC1 side of the hookup. Make sure the program is running (hearbeat LED) and double check the connections. If you have skipped some steps (maybe done your own program rather than use ours) due to prior experience with our other products, check that you are using 9600 baud.
If it is never getting connected, the problem lies in the Bluetooth department of your phone.
The program
The full program is listed below, with extensive annotations. To show/hide the program listing click here. There are pop-ups for each major functional block of code, and clickable links on individual instructions that take you to the formal descriptions of the instructions.
The block annotations are marked like this:
;[...]Place your mouse over that line to see a pop-up describing the overall logic of the block.
Many instruction also have clickable links to the formal definition online. (Tip: Click the link with your mouse wheel to open in a new browser tab)
Please invest some time studying the program. Even if you don't understand all the details, try to at least get the general drift of what the major blocks are all about.
;EC1 sample app showing Bluetooth connection to an Android device running SimpleHMI
;[...]
HMIPort         EQU     252     ;Define the port number for SimpleHMI. The Bluetooth adaptor is on port 252

;[...]
oRedLED         oEQU    1
oGrnLED         oEQU    0
iButton         iEQU    0

;[...]
#       Open_Serial Port(HMIPort) User(9600, 8, N)      ;Initialise the serial port, 9600 for JY-MCU Bluetooth module
                                                        ;NOTE: The SPLat branded Bluetooth adaptors run at 38400 baud.
;[...]
#       HMI  Port(HMIPort)  ConnectEvent(evHMI_Connect)   ;Where to Gosub when the SimpleHMI connects

;[...]
        GoSub           HomeScreen                      ;Paint the screen on the Android device
;[...]
        LaunchTask      tskHeartBeat                    ;Show we are alive
        RunTasksForever

;---- Event handler for the HMI Connected event -------
;[...]
evHMI_Connect:
        GoSub           HomeScreen     ;Paint home screen
        Return

;----- Paint the home screen ------
;[...]
HomeScreen:
#       HMI             Cls() HideAllButtons()
#       HMI             ButtonEvent(,5,9,3,20,"Touch me",evButton) ;Draw SimpleHMI button, declare its handler
        Return

;----- Event handler for the SimpleHMI button ------
;[...]
evButton:
        On              oRedLED
        Pause           100
        Off             oRedLED
        Return

;----- HeartBeat task -----
;[...]
tskHeartBeat:
        On              oGrnLED
        Pause           2
        Off             oGrnLED
        Pause           50
        GoTo            tskHeartBeat
Try this at home ..
If you touch the button on your phone 3 or 4 times in quick succession, you will get more than one second on-time on the red LED. Have a go at making the following modification to the SPLat program, so this does not happen:
Inside the evButton subroutine, before the delay, paint a new screen with a message saying it is busy, then after the delay re-paint the home screen. This will make the button inaccessible so a user cannot touch it multiple times in a row.
Hint: Check out the Cursor() and Text() hash functions.
... and this
Make a second button on the home screen. Make it so it gives a long (say 5s) flash of the red LED
What next?
For more quick fun:
Control an RGB LED from your smartphoneFor more useful learning:
If you have got to here with everything working, you are one your way to creating useful apps based on using an EC1 in conjunction with an Android device. Take a look at the full SimpleHMi tutorial. Do note however that the tutorial was written when SPLat boards only had one serial port, and it was written for SPLat branded Bluetooth adaptors communicating at 38400Baud (versus 9600 for the CY-MCU adaptor). To convert the examples just modify them in line with the following snippet (I have highlighted the significant bits):
HMIPort         EQU     252                             ;Define the port number for SimpleHMI. The Bluetooth adaptor is on port 252
#       Open_Serial Port(HMIPort) User(9600, 8, N)      ;Initialise the Bluetooth serial port, 9600 for JY-MCU Bluetooth module
#       HMI  Port(HMIPort)  ConnectEvent(?????)         ;????? = where to Gosub when the SimpleHMI connects